Posts

Showing posts from September, 2021

.08 - Using Composition

Image
Today I learned about composition in class we watched a clip of a movie and put our knowledge of composition and camera angles and shots to the test.   Framing: Role of any rule composition is to draw the eye into a photograph. Its when elements of the scene are used as a frame within the frame of the picture. Rule of Thirds: Is when you divide your image by 2 horizontal lines and 2 vertical lines. You then position the important elements of the image along the lines. When you align a subject within the points of the grid it creates tension, energy and tension. Depth of Field: The distance between the closest and farthest  objects in a picture that appears sharp. Deep Focus: Includes foreground, middle-ground, and extreme background objects. This shot keeps both close and background objects in focus. Shallow Focus: Has a small depth of field. one subject is in focus while the rest are not Focus Pull: Where you change the focus during the shot. Adjusting focus from one subject ...
.07 - Using Camera Shots cont.

Image
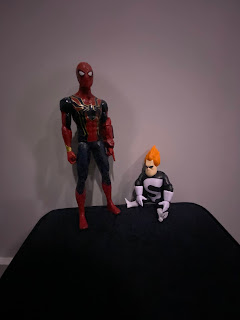
I took these pictures in my room with my cell phone camera. Two difficulties I had during this section was differentiating the bird's-eye-view shot and the aerial shot and taking a POV shot.  Two-Shot: A shot in which two subjects appear in frame. Usually used for romance or tension Aerial Shot: Showing a location from high overhead. Usually shot from helicopters, drones, or with miniatures. Bird's-Eye View: A  high angle shot, shot directly overhead and from a distance. Shot gives the audience a wider view this shot can reveal a variety of things including things out of a subjects view. Shot is usually taken from a crane, helicopter or drone. Point-Of-View Shot: A shot to imitate what a certain character is seeing. Puts the audience in the head of the character. Lets the audience experience a subject's emotional state examples of this is characters waking up or looking through binoculars Over-The-Shoulder Shot: Commonly used shot where a subject is shot from behind the sho...

.06 - Using Camera Shots

Image
 In the presentation where we went over camera angles we also went over a variety camera shots. I took these pictures in my room with my cell phone camera. Establishing Shot: An Establishing Shot is usually the first shot of the scene to establish location and scenery. This can be used to evoke mood and give the audience the general situation.  After revising the image i noticed this should have been horizontally shot Master Shot: The Master Shot identifies key signifiers liker who is in the shot where the location is. The master captures all the characters in the scene and then allows other shots to be interwoven. After revising the image i noticed this should have been horizontally shot Close-Up Shot: The close-up is a shot where a character's face fills up majority of the screen. A close-up can emphasize a small area or detail of the character such as the eyes. Mid-Shot: A mid or medium shot usually shows the subject shot from the waist up. This is one of the most common sh...

.05 - Using Camera Angles

Image
     Through the presentation gone over in class we spoke about the three different types of camera angles and looked at examples of them. For this assignment I took pictures in my room with my cell phone. The first type of camera angle shown was: High Angle Description: A high angle shot is used in the shot to make the subject seem powerless and the high angle allows the perpetrator to be in the shot as well. The second type of camera angle shown was: Low Angle Description: The low angle shot is used to give the effect that the subject you are looking up to is powerful or as in this shot shows the subject feeling on top of the world. The last camera angle shown was: Canted Angle Description: The canted angle shot is composed with vertical lines at an angle so that the horizontal line of the shot is not parallel, This produces a viewpoint of a tilted view. In this shot is giving the effect of confusion. Learning how to use these angles can help in my production of media t...

.04 - Learning & Practicing Designing

Image
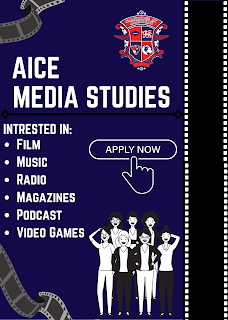
On 8/31 I learned about a new program that we will be using to create media/images for the magazine and other assignments during the course. Our template was to make a flyer for AICE Media Studies. Through the designing process we were taught how to find the shapes, colors, and images we needed to complete our flyer. For me this was a new experience and I particularly enjoyed creating this flyer. This knowledge will definitely help me throughout this course. this was made by me through Canva